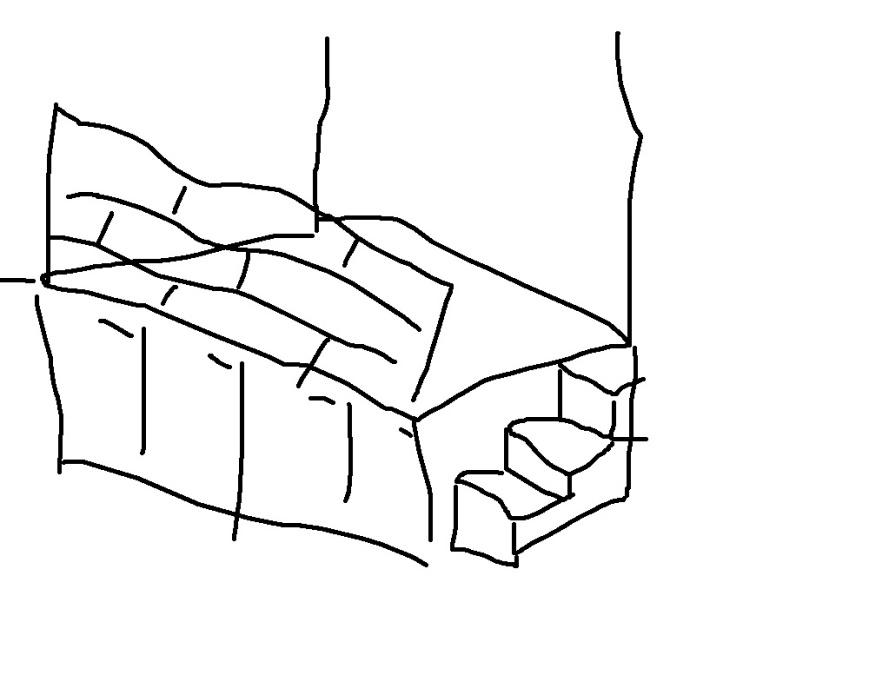
I needed more storage in the apartment, because I hate crowded, poorly organized closets. I like to see my clothes and regularly used stuff at once, and find it very frustrating to have stuff piled high. I also liked the idea of a raised bed, thinking that would create some separation between the “bedroom” and “living room” portions of my one room. The sliding doors are another hack-in-progress, more on them later…
So I doodled a bit (drawing’s not my strong suit, as evident above!) and came up with something that I liked. Originally I thought to incorporate some kind of a bookshelf to act as a rail so I wouldn’t fall from the bed, but pretty soon I realised this wasn’t going to be necessary. I haven’t fallen from my bed since I was 4 or something… It also looked nicer without the railing.
Then I sketched it up with the measurements I knew I would work with. I had already decided to build the base out of Ikea kitchen cabinets and doors. I’ve seen a lot of raised beds in Ikea Hackers and elsewhere in the net, and the cabinet versions seemed to end up looking the nicest. They also played together with my new kitchen, helping to make the small space coherent and calm.
Altogether there’s nine cabinets. Four 80 cm wide ones: 2 in the front and 2 in the back. There’s one 60 cm wide cabinet on the back, since the back wall is 230 cm and 60 cm was the widest that would fit. And then there’s four 40 cm wide cabinets: one in the front and three in the end.
All of the cabinets rest on a simple wooden footing on the floor, but nothing is attached to the floor or the walls. The weight of the unit with the bed on top is plenty enough to keep it in place. I put loads of big felt pads under the footing to keep it from scratching the floor, in case I want to sell the place later. I’m not sure those are necessary, but they’re there now… I even remembered to paint the lumber footing before laying it on the floor, so I didn’t have to paint it in the spot!
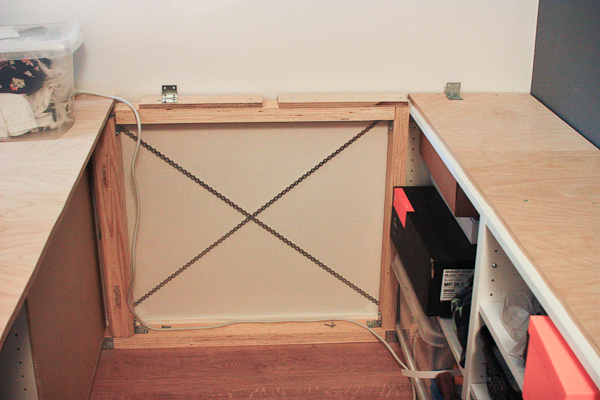
The cabinets are attached to the footing and to the adjacent ones. Then I built the inner structure, adding lumber to hold most of the weight of the bed and to rigidify the part with no cabinets. The big pieces of lumber are on 2 corners of the bed and the cabinets and smaller lumber hold the back side of the bed. I also added 15 mm plywood on top of the cabinets to give them a nice finish and to keep with the theme of the kitchen (and to make the top level, where they’re not visible). Only the parts that are visible form under the mattress are treated – yes, I’m lazy. 🙂
My bed is a box spring -type bed (the kinda mattress with a built-in wooden frame, they don’t seem to sell the exact same type at least in the States) from Ikea and I attached it to the cabinets and the plywood with L-brackets. That way I didn’t need to build a “roof” to my storage space: the mattress forms the roof. I just made sure to measure the base so that the mattress covers the opening!
A quick search didn’t come up with a tutorial on how to shorten the cabinets for the steps, so I’m thinking of doing one. But since I didn’t take pics the first time I did these, it might be a while…
Basically, I just sawed the sides of one 40 cm wide cabinet into two and drilled new holes to correspond to the required bits to assemble the cabinets. To someone with a bit of DIY experience it was pretty straightforward and easily figurable just by looking at the parts and how they were supposed to fit together. Of course I needed 2 cabinets for the hack (to have enough top and bottom parts), but I didn’t need to use the sides of the other cabinet. I also got around with just 1 door for these shorter ones!
I left the 80 cm wide middle cabinet open (no backing!) to form a doorway into my storage space. To keep it looking uniform I only used the 40 cm wide doors. Most of the plywood is attached with screws from underneath, but the smallest step was so low that it was easier to glue the cover piece on it. Oh, and then I put some thick cardboard covered with DC Fix (a semi-permanent plastic film/tape) over the end piece on top of the steps, to cover the hole there and make it look nice. That’s just attached with double sided tape and seems to be holding up fine.
And I even have a light under there, to make it easier to rummage for what I need… I think it turned out pretty nifty, and it’s definitely great to have so much storage! It makes me happy just looking at it – there’s nothing quite like the feeling of a job well done!
Let me know if you find this helpful and please share if you build something similar! I’d love to see your interpretation of the storage bed! 🙂


Great build man! Loved the “secret compartment”/storage idea. Very good use of space.
I have one question though, when it’s “special time” ( you know 😛 ) does everything holds together nicely? 🙂
Hahaha yeah, everything works! I did have to make a bit of a change in regards to that, though… 🙂 without a sheet of wood below the bed, the air inside the structure gets compressed if someone, say, jumps on the bed, and then the doors open. So you could place the bed on top of a plywood sheet or take the easy way out and open one of the doors before you want to, ahem, jump on the bed. 🙂
This is amazing. Great work!
Thank you Tracy! 🙂
Your hack just made it onto Gizmodo! Congrats! It’s too bad they’re shutting down ikeahacker.com. 😦
Thanks, yeah I’ve been getting a ton of traffic 😀 It’s a total shame about ikeahacker, I love that site!
since you mentioned your cabinets are no longer on Ikea, I found the Akurum’s. They are ~24″ deep – does that sound about right?
Hi Ku, mine are about 40 cm which comes to about 15 in deep. I’m sure you could use the Akurums just as easily, though!
Pingback: The Best Hacks From The Fan Site IKEA Doesn't Want You To See | Gizmodo Australia
Hi there! Thanks so much for sharing. This is such a great hack! I love it! I am just wondering what did you use for the stairs? Is it from Ikea too?
Thank you Mimi! 🙂 The stairs are the same cabinets as the rest (Faktum), but I sawed them shorter to make the steps.
Pingback: Slim! Maak opslagruimte onder je bed | Home / Planetfem.com - Home | Living | Design and interieurs onlineHome / Planetfem.com – Home | Living | Design and interieurs online
I love this! What are is the final height of the whole unit and what is the name of the cabinets you used?
Thanks kat! The height is 75 cm for the platform and about 100 cm for the top of the bed. The cabinets are the now-discontinued Faktum.
can you just come make this for meee
Hehehe sure, will do 😀
what size is your bed?
120×200 cm, that’s about 47×79 inches I think
what kind of bed do you have?
Double, Queen , or King?
This is awesome! I really would like to do this when I move into my new home. I have never done anything of the sort though… 😦
Just try it, Mish, it’ll go great 🙂
Are these cabinets still at Ikea? If not which ones do you think will work best?
Nope, they are the discontinued Faktum series. I think their new Metod series might work just as fine!
and how much did it cost in total?
I think around 200-300 euros?
This is the most amazing bed I’ve ever seen!!! Wow!
Do you think two not-so-handy-but-very-enthusiastic people can do this?
And one more question: When you say, it’d cost you 2-300 euros, does that include the mattresses? 🙂
Thank you so much for sharing this!
Oh sure, the only difficulty is the stairs and they’re not very difficult either – plus you can replace them with something readymade. Go for it! 🙂 The cost was only the cabinets, lumber, wax and stuff, I already had the mattress from before…
Pingback: 10mal... DIY Betten mit Stauraum | Laux Interiors - BerlinLaux Interiors – Berlin
What size mattress did you use?
how long did this take you?
Also on the outside of the structure, are there doors that open to access your storage? Or is the backside of the cabinet facing the outside?
Hi, i am looking to build something like you have there. Looks amazing.
I am just curious on some parts
How much have you spent building this. I have made some calculations and it might cost about 1.5k in singapore but i am using drawers instead of cabinets on some parts.
How do you combine 2 cabinets together. You mentioned screwing them together.
Hi!
Im so happy to have found this DIY, been wanting to do something similar for a really long time and this is exactly what ive been searching for! Amazing! 😀
I just want to know what you used to cover up the “hole” to the right of the second step? I can’t seem to figure it out..
Thanks for sharing btw!
Pingback: 8 DIY Storage Beds to Add Extra Space and Organization to Your Home
I have found the Faktum cabinets online, although I am in Aus. Were the cabinets you used just plain wall cabinet frames or were they a mix? If you know could you please give me the exact product as I am new to the whole DIY thing and am need of a serious bedroom makeover. Absolutely love the idea though.
Hei,
Olisin super kiinostunut tekemään tälläisen sängyn koska näyttää vaan niin siistiltä, Mutta tuosta udesta Metod sarjasta ei vain tunnu löytyvän samanlaista kaappia. + Miten sänky pysyy vasemmalla puolella kun ei ole laisinkaan noita L-kiinnikkeitä. + Ostitko Puun kehikkoon ikeasta ?
Tosi hieno sänky voisinpa itse tehdä samanlaisen.
Which of the METOD drawers would you recommend to use if you were to recreate this? and also how would you make the steps?
This is so inspiring! 🙂
Hi, I was wondering how much this cost you all together.. once u bought your supplies
this looks class, getting hubby to try to build this for a daughters room next month.. fingers crossed it works..
Pingback: 8 Awesome Pieces of Bedroom Furniture You Won't Believe are IKEA Hacks
Pingback: 8 Awesome Pieces of Bedroom Furniture You Won’t Believe are IKEA Hacks | Interior Design Blogs
Pingback: 13 INGENIOUS IKEA HACKS FOR SINGAPORE HOMES | shenggroup
Pingback: Optimera förvaringen under sängen – IKEA lösningar | Förvaringsdrottningen